Friday, March 8, 2013

Emerald Bubble Necklace


Bubble Necklace

Here is my version of those adorable Bubble Necklaces that keep popping up everywhere and in sooooo many fun colors. 


Here are the Supplies you will need:


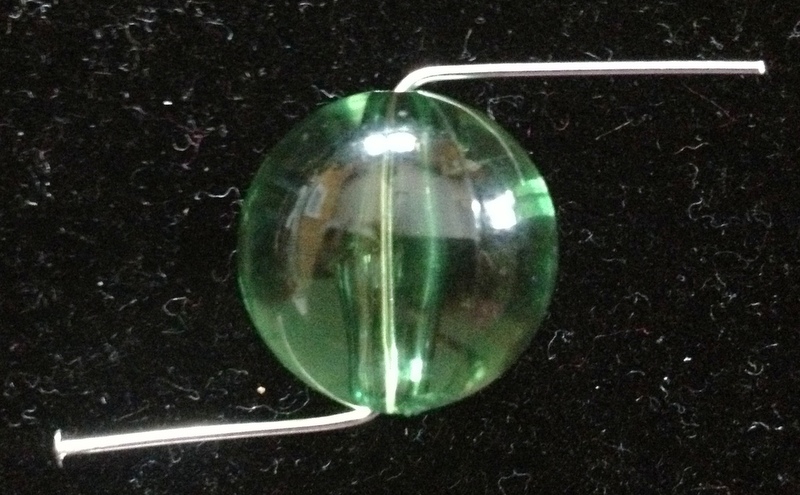
1-- I took my first bead and put a head pin through the hole and then bent the head pin 90 degrees. Bending it either right or left is fine -- just do the opposite on the bottom.  I find it easier to work with the head pin this way.  

 
2 -- I bent the bottom of the head pin the opposite direction again in the 90 degree angle so I could get ready to use my round nose plier to bend them back to form the round circle part.
 
3 --  By using the round nose pliers and bending the head pin back in the opposite direction you can see in the picture to the left I am using the cutting tool to clip off the excess piece to have a round circle. 
So for example, in the picture above the headpin on the top portion is bent to the right so you take your round nose plier and clamp onto the headpin and you will bend it back to the left.  That's how the circle part is formed.
Next I found the center of my chain and hooked the rounded piece inside one of the loops in the chain and then clamped the rounded headpin. 


4 --  I took my next bead which in this case is the square foil bead and repeated steps 1, 2, & 3 but instead of clamping the bead to the chain I connected the bottom of my first bead with the second.


To add the dangling beads I took a small bead cap and slide it down the headpin and then slide down the bead so there stacked on top of each other.  Then you push the headpin over into a 90 degree angle to make the rounded part to connect with the second bead.  I also added a jump ring to give different lengths of the dangling beads.  


Here you can see what the dangling pieces look like when there all put together.  


Here is where I added the 4mm rondelle, then the medium headpin, then the bead and it all just slides down the head pin making it staked on top of each other. 


Here is what it looks like after it is stacked on the head pin. 


Again, I bent the head pin in a 90 degree angle and formed the rounded part to be connected to the chain.

 
So from the center of the chain I counted up 5 links and then hooked my next bead in and continued to make my way up the chain to a desired look.  So in the center of the necklace is a long piece then a single bead followed on both sides and followed by another long piece until I got the look I wanted. 
 
 
"Ta Da" The finished look!
My version of the "Bubble Necklace"


Tuesday, February 19, 2013

Blog Conference 2013

Build Your Blog 2013
 
Here are a few of the friends I made at the Conference!
Amy Cowley from The Happy Scraps thehappyscraps.blogspot.com (Were actually cousins)

 Check out the Madness!!!!  So much Fun
 
The adorable Holly from: www.sisterssuitcaseblog.com


The Six Sisters from sixsistersstuff.com

The Beautiful Brooke Walker from Studio 5

Jonie Sumsion from Just-Between-Friends
 
So much fun! This is only a small handful of the Amazing women I met and can't wait to do something like this again.  Woot! Woot!

Tuesday, January 15, 2013

Valentine Inspirations


Here are some "Girly" Valentine Creations I have been working on. I have seen lately these adorable "Chunky" Necklaces for Little Girls. I just got in some Diamond Pendants that are becoming so popular on Children's necklaces.  I have also seen purses, roses, hello kitty, and etc. as adorable focus pieces.  Here I used ribbon, diamond pendants, and flowers as my focal pieces. 


Here I selected a group of beads to work with.  You will need wire (I used .14mm accuflex) , crimps, lobster claw, split ring, and beads.  You simply then clamp one end of the wire and start stringing on the beads in a pattern as desired.  To end the necklace that's where you will use your crimps, split rings, and lobster claw.  The necklace sizes were 16" and the bracelets were around 6".  Supplies cost just under $8 for the necklaces and under $2 for the bracelets.  What a bargain, yet customized. 


To create the pink flower pendant I used the G-S Hypo Cement.  You can get this at Jo-Ann's.  Before you start gluing down the white flower make sure to have the hole that the string goes through in a horizontal direction so the flower will sit right when its finished.  I simply glued around the pink center and placed the white flower on top
 
and then glued around the silver bead and set it inside of the white flower.


                                                          and "Viola" the finished product.


Saturday, January 5, 2013

Pantone Spring Colors 2013


So here is the Spring Color line for 2013 from Pantone.  I am excited about this and look forward to making jewelry that coordinates with these colors. 


Click on the Share link below to view these colors on the Pantone Website and here a report from  Leatrice Eiseman, executive director of the Pantone Color Institute, tell you why they were inspired to pick these colors for spring. 

share

Wednesday, January 2, 2013

Downton Abbey


Season 3 Premieres, this Sunday the 6th at 8:00 on PBS.  So excited for this new season.  I love all the drama, Clothing, Respect, this Era, and especially the sophisticated dinners.  They have some Classic Jewelry pieces that I always look forward to seeing.   

Here's just a few of my favorite Jewelry Pieces!


How about you? what is your favorites about this show?